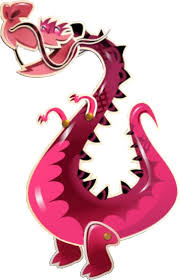
Got a love for arts and crafts? Want to recreate this interesting Candy Crush character physically in the game's multi-part paper cutout art style? Follow the instructions below!
YOU WILL NEED: Before starting, please make sure you have the following:
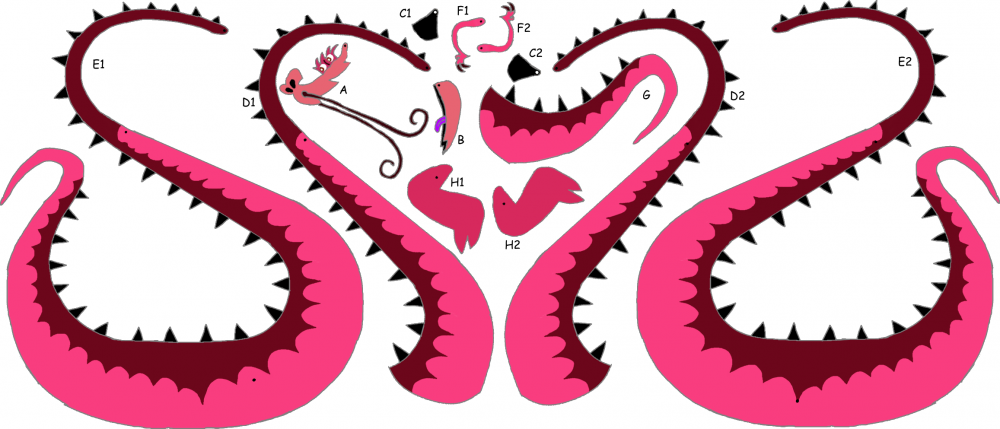
- A printout of Denize's cutout sheet above
- A pair of scissors
- A roll of tape
- At least 3 brass fasteners (add 2 more if you want to make Denize's full appearance)
Children should be supervised when crafting Denize. Due to her numerous dorsal spikes making it difficult to cut her out efficiently, please budget a significant period of time for this crafting project.
The steps for crafting Denize are as follows:
- Cut out all of Denize's parts and set them all on a large, flat surface. You may want to retain an uncut copy of this sheet digitally for your reference to know which parts are which. This is the longest and hardest step, so please be patient and careful when cutting.
- Begin by assembling Denize's head, using parts A and B, as well as one of the two C parts, which comprise her ear-like neck frills. Push your first brass fastener through the indicated holes of those parts in that order. Make sure Denize's lower jaw (B) is positioned within the barbels in her upper jaw (A).
- Before you lock the first fastener, choose now whether you want to show Denize partially or fully. (The former is the typical in-game appearance of the character, where legs are not shown and she is usually floating in liquid.) If you choose the former, push the brass fastener through the top hole of part D2 and then D1. For the latter, push the brass fastener through the top hole part E2 and then E1. (Since D2 and E2 are mirror images of D1 and E1 respectively, make sure both parts line up completely with their printed sides facing outward). Then stick the other C part (the other half of her neck frill) to this brass fastener and then lock that fastener by spreading its prongs out.
- Next, assemble Denize's arms. Swing part D1/E1 out. Take one of Denize's arms, part F1 in particular, and flip it so that you see white facing up. Push your next brass fastener through the shoulder end of this part and into the central hole you see in part D1/E1, then lock the fastener. Then swing part D2/E2 out, take the other arm, part F2, and push a third brass fastener through the shoulder end of that part and into the central hole you see in part D2/E2. Lock this fastener as well.
- If you are making Denize's partial appearance, skip this step. Otherwise, assemble her legs. With the torso parts still swung out, take one of Denize's legs (H) and flip it so you see white facing up. Push your 4th brass fastener through the top of this leg and into the last available hole of part E1. Then take the other leg (H) unflipped and push your final brass fastener through its hole and the last available hole of part E2. Lock both fasteners.
- Rotate parts D1/E1 and D2/E2 back together so that they align. Once you've made sure the spread prongs of the 2nd and 3rd brass fasteners you locked (as well as the 4th and 5th if you are making Denize's full appearance) stay within the elongated shape of Denize's torso, seal the two torso parts together by folding tape over the ventral scales (and within the gaps of her dorsal spikes, for increased durability), and congratulations, you now have completed a physical recreation of Denize the dragon! (If you are making a partial version of her, note that part G is her partial tail.)
And also, happy birthday, Denize!